In a shared folder within the network, we can access the various ways. For example, we can get access using the "Double Back Slash (\\)" sign within the "Run" option. Another way we have, map the shared folder with our computer. This method is called "Map Drive" or "Drive Mapping".
The biggest advantage of this drive mapping is that, the share folder does not have to be connected repeatedly. Once connected, it will be automatic connecting since then. But in other cases, whenever it needs access to the share folder, it must be connected.
Today we will see in this article, how to mapping the drive in windows.
First we need to create a shared folder or share the existing folder that we want to map.
Map drive can be created in two ways. First of all, we can create a map drive from "This PC" or "My Computer" option within desktop. Just right click on "My Computer" icon or "This PC" icon and select "Map Network Drive". However if you want to map by using this method, then you have to enter the entire network path.

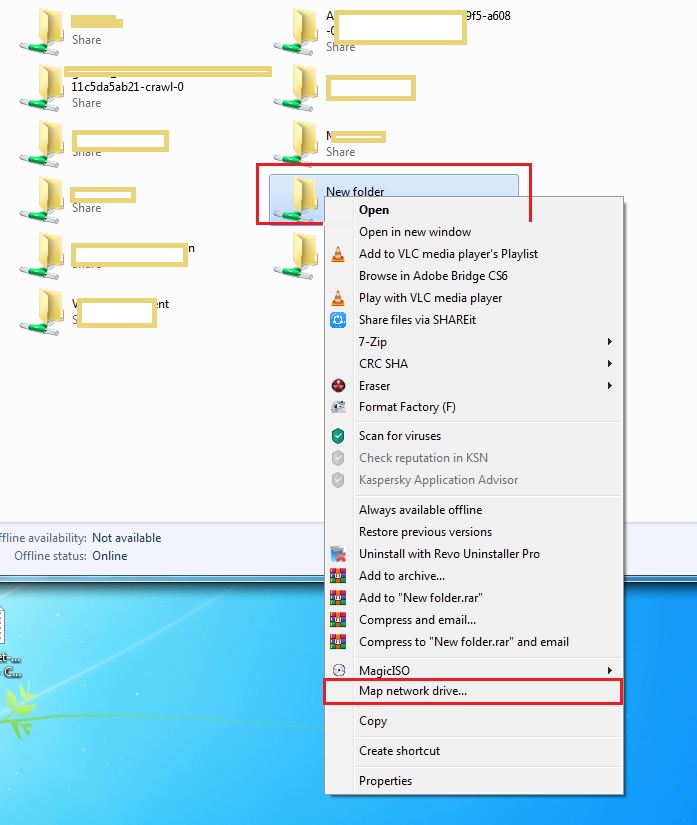
And the second method is, just right click on the shared drive and select "Map Network Drive" option. Here, network path will be added automatically. Just as below:-

Now we will discuss the step by step process. First of all Method one.
Just right click on "Computer" icon or "This PC" icon from desktop and select "Map network drive".

Then following interface will appear. Now you have to type the network path. And finally, click "Finish" button.

Now map drive will appear inside the drive list on "This PC" or "Computer" option.

Now we will discuss about the second way, how to create a map drive.
At first go to the shared folder and right click on it. Then select "Map network drive".

Now click on "Finish". Automatically network path will be added.
Done. Now open "Windows Explorer" to access your map drive.
The biggest advantage of this drive mapping is that, the share folder does not have to be connected repeatedly. Once connected, it will be automatic connecting since then. But in other cases, whenever it needs access to the share folder, it must be connected.
Today we will see in this article, how to mapping the drive in windows.
First we need to create a shared folder or share the existing folder that we want to map.
Map drive can be created in two ways. First of all, we can create a map drive from "This PC" or "My Computer" option within desktop. Just right click on "My Computer" icon or "This PC" icon and select "Map Network Drive". However if you want to map by using this method, then you have to enter the entire network path.

And the second method is, just right click on the shared drive and select "Map Network Drive" option. Here, network path will be added automatically. Just as below:-

Now we will discuss the step by step process. First of all Method one.
Just right click on "Computer" icon or "This PC" icon from desktop and select "Map network drive".
Then following interface will appear. Now you have to type the network path. And finally, click "Finish" button.

Now map drive will appear inside the drive list on "This PC" or "Computer" option.

Now we will discuss about the second way, how to create a map drive.
At first go to the shared folder and right click on it. Then select "Map network drive".
Now click on "Finish". Automatically network path will be added.
Done. Now open "Windows Explorer" to access your map drive.
No comments:
Post a Comment